Trade Now


Trade Now

Maximize your profit by copy our Trade
Are you struggling with your trading journey and want a clear, logical, and professional strategy to level up your Forex trading skills?
Then understanding Supply and Demand trading using Smart Money Concepts (SMC) can completely change the way you see the market.
At its core, price movement in any financial market happens because of one simple rule: Supply and Demand.
Trade Now
The price of any asset moves based on the balance between buyers (demand) and sellers (supply).
Supply refers to the availability of an asset against market demand.
When supply is greater than demand, price tends to fall
Sellers dominate the market
Demand refers to the willingness of buyers to buy an asset at a certain price.
When demand is greater than supply, price tends to rise
Buyers dominate the market
In trading, supply and demand are not single price levels — they are zones (areas) on the chart.
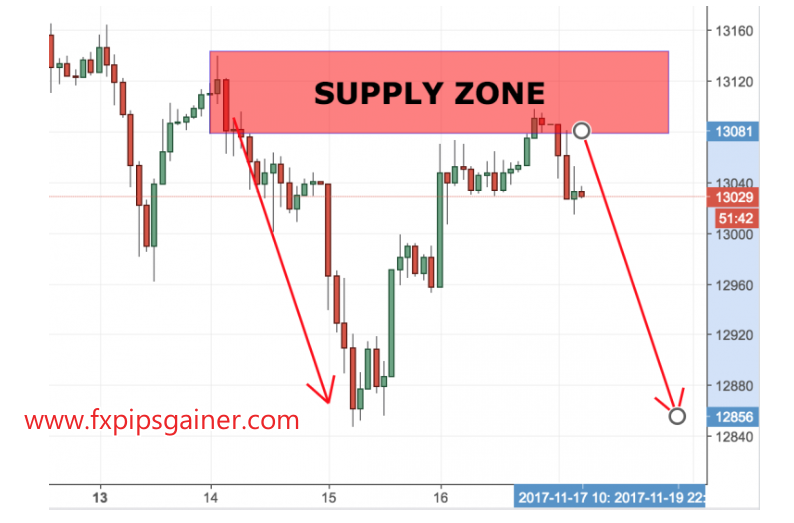
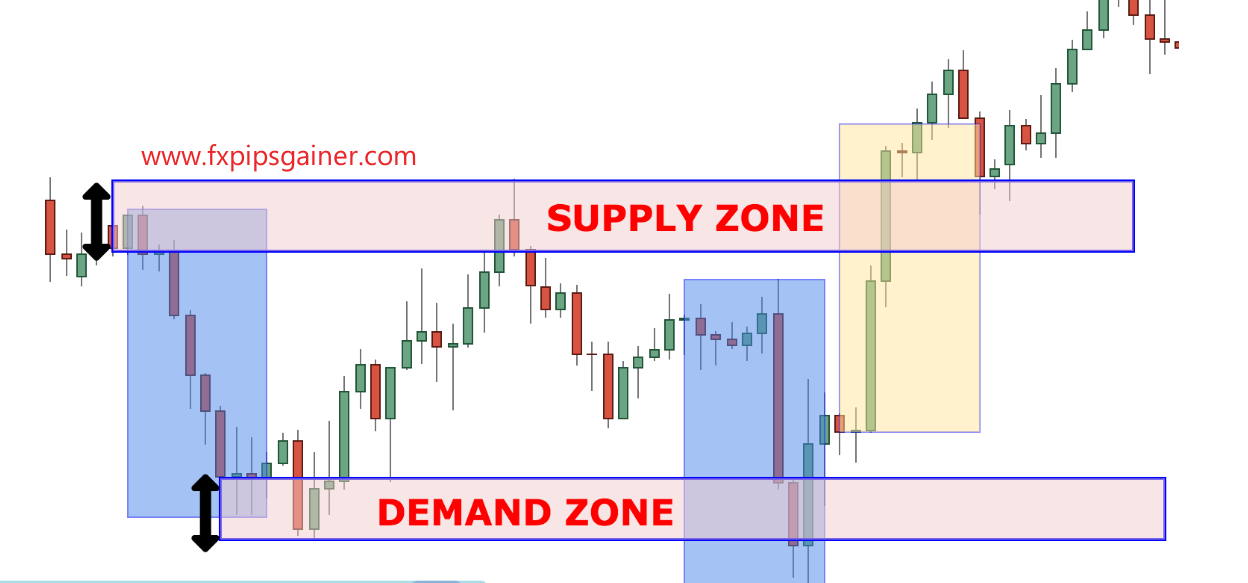
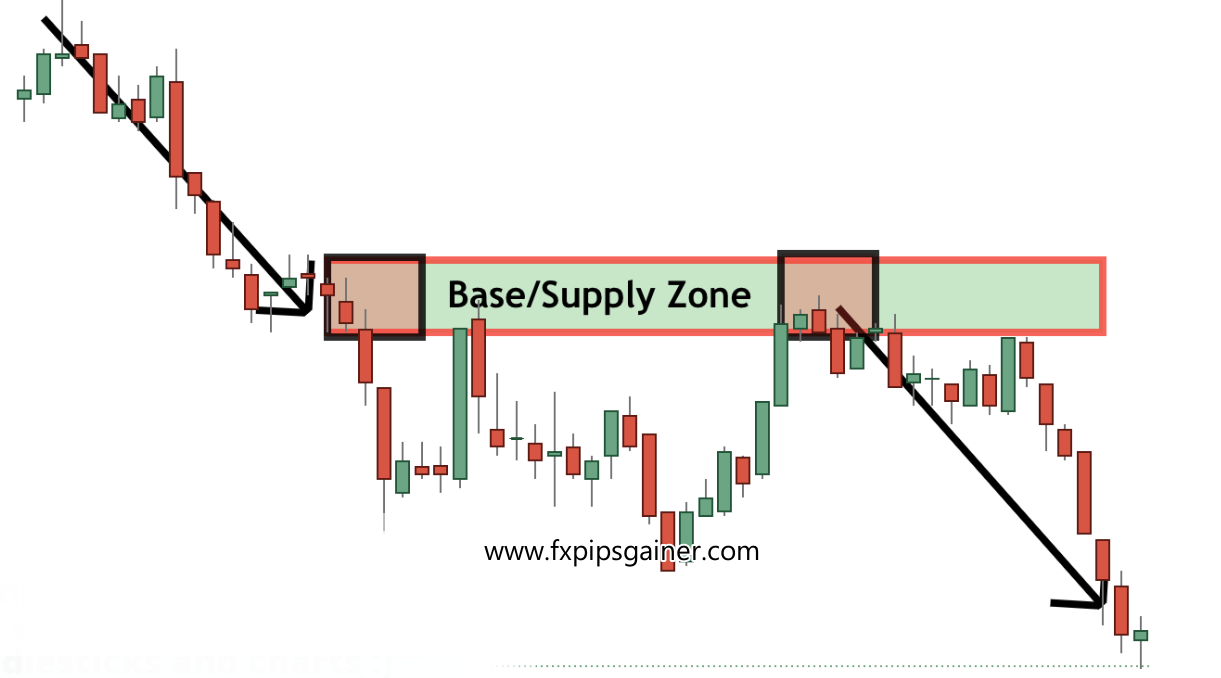
A Supply Zone is an area on the price chart where:
Large sell orders are placed
Institutional traders are believed to sell heavily
Price drops quickly and aggressively from that area
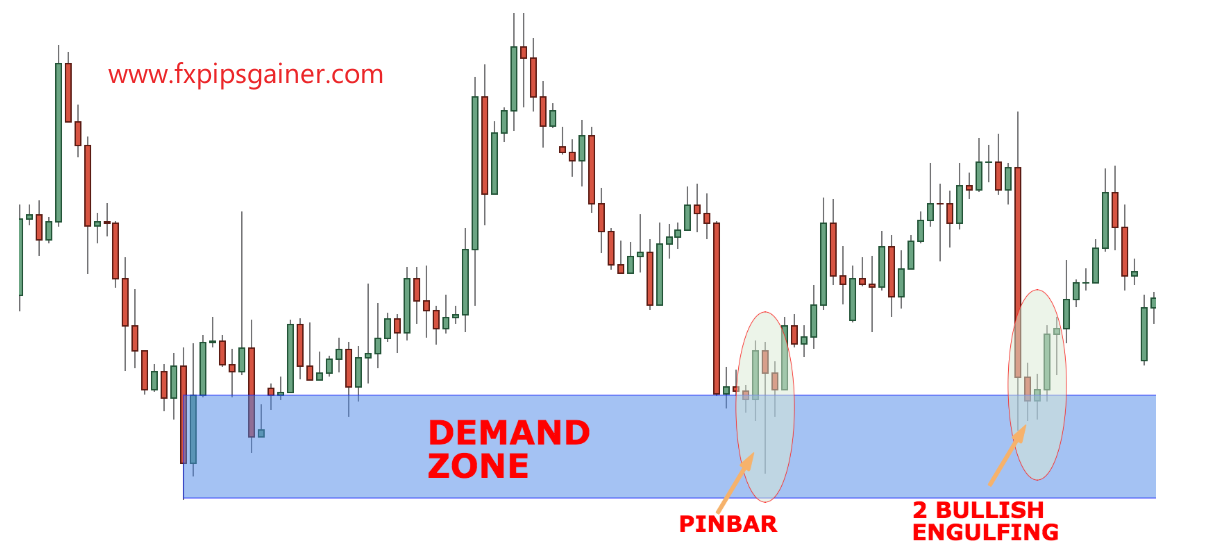
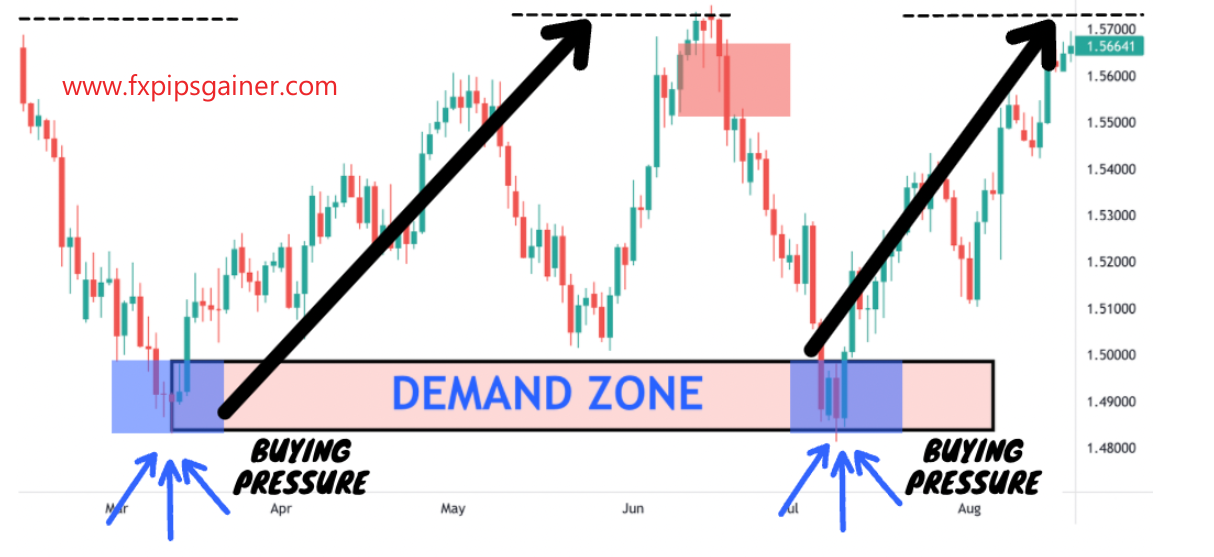
A Demand Zone is an area on the price chart where:
Large buy orders are placed
Institutional traders are believed to buy heavily
Price rises quickly and aggressively from that area
These zones act as high-probability reaction areas in the market.
According to Smart Money Concepts, institutions and banks do not enter the market randomly.
They:
Enter trades with huge volume
Leave behind footprints in the form of strong price moves
Create supply and demand zones
Retail traders wait for price to return to these zones to:
Follow institutional flow
Catch reversals
Trade trend continuations with lower risk
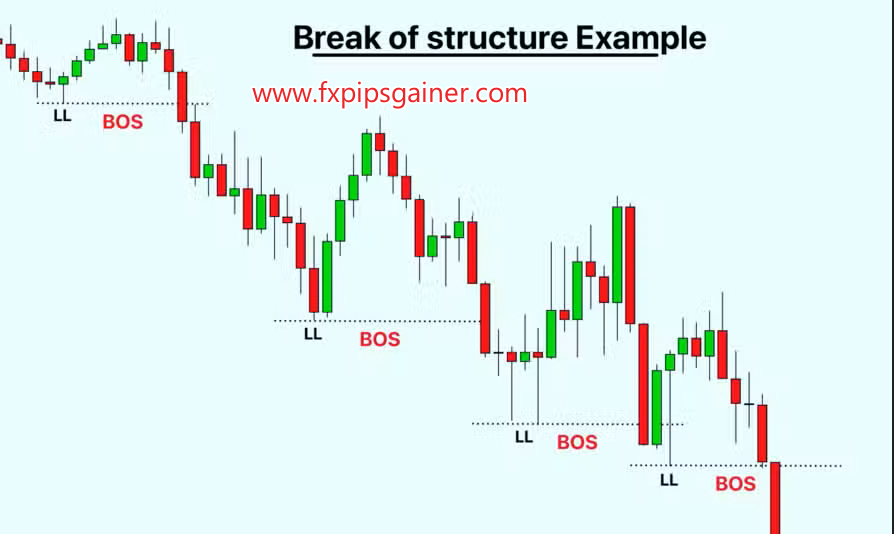
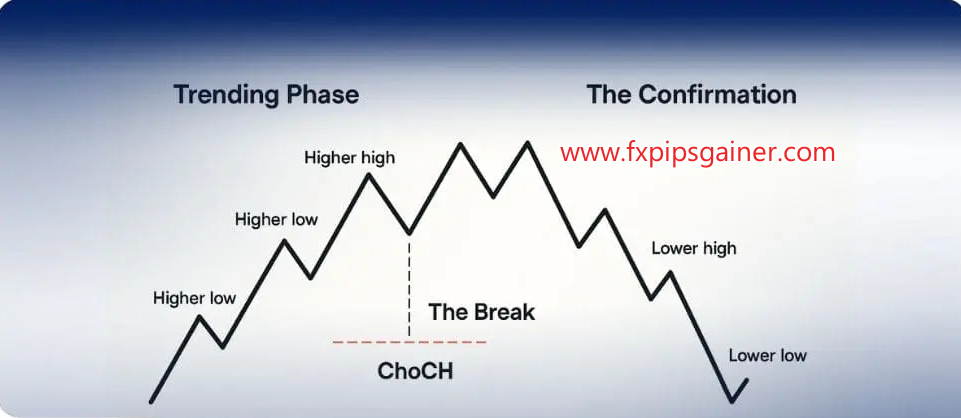
Before identifying supply and demand zones, you must understand market structure.
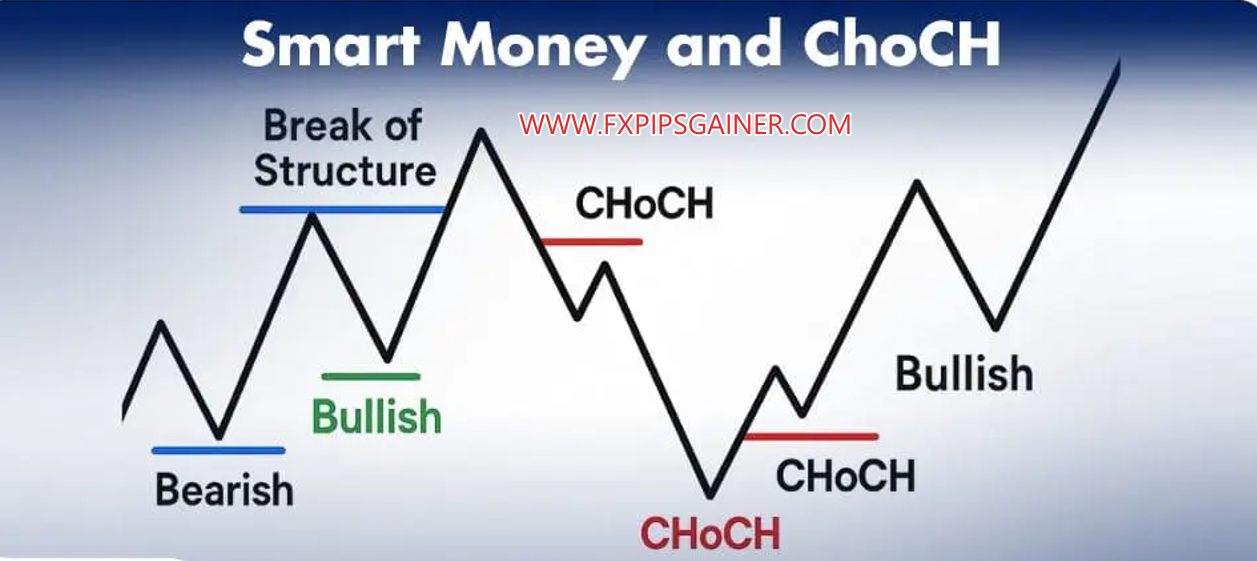
A Break of Structure (BOS) happens when the market:
Breaks previous highs in a bullish trend (Higher High)
Breaks previous lows in a bearish trend (Lower Low)
This confirms trend continuation.
Maximize your profit by copy our Trade
A Change of Character (CHOCH) happens when the market:
Breaks structure in the opposite direction of the trend
Signals a potential trend reversal
Examples:
Bearish → Bullish: Market breaks previous lower high
Bullish → Bearish: Market breaks previous higher low
Once market structure is clear, zone identification becomes simple.
Supply zones are best used in a bearish market.
A valid supply zone forms:
Before a bearish BOS
Before a bullish-to-bearish CHOCH
After a retracement (one or more bullish candles)
Followed by a strong and impulsive price drop
The retracement area before the drop is marked as the Supply Zone.
Demand zones are best used in a bullish market.
A valid demand zone forms:
Before a bullish BOS
Before a bearish-to-bullish CHOCH
After a retracement (one or more bearish candles)
Followed by a strong and impulsive price rise
The retracement area before the rise is marked as the Demand Zone.
Bullish → Look for Demand Zones
Bearish → Look for Supply Zones
Never trade against the higher-timeframe trend.
Market shows bullish BOS or CHOCH
Identify the Demand Zone
Wait for price to retrace into the zone
If zone is large, wait for 50% retracement
Confirm entry using lower-timeframe structure shift
Stop Loss:
10–20 pips below the low of the demand zone
Trade Now
Market shows bearish BOS or CHOCH
Identify the Supply Zone
Wait for price to retrace into the zone
If zone is large, wait for 50% retracement
Confirm entry using lower-timeframe structure shift
Stop Loss:
10–20 pips above the high of the supply zone
No trading strategy is 100% accurate — including Supply and Demand.
To protect your capital:
Never risk more than 1–2% per trade
Always use Stop Loss
Avoid overtrading
Follow one strategy consistently
Maximize your profit by copy our Trade
Supply and Demand trading using Smart Money Concepts is a powerful and logical approach to Forex trading.
When combined with:
Proper market structure
Discipline
Risk management
It allows traders to trade with institutions instead of against them.
Master the concept, practice on demo, and apply patiently — consistency will follow.