What Is a Mitigation Block (MB)?
A Mitigation Block (MB) is a special type of Order Block within ICT’s Smart Money Concepts. It forms when the market makers or large institutions need to mitigate (offset) previously placed orders before continuing the trend in a new direction.
In simple terms, a Mitigation Block is a zone created after the market structure shifts, and it often becomes a support or resistance level for future price movement.
How a Mitigation Block Forms
A Mitigation Block appears when the following happens:
The market attempts to continue its existing trend
(e.g., moving upward by forming Higher Highs and Higher Lows).Price reaches an opposing reference level
(such as a strong supply zone during an uptrend).Price fails to make a new high or low, showing the trend is weakening.
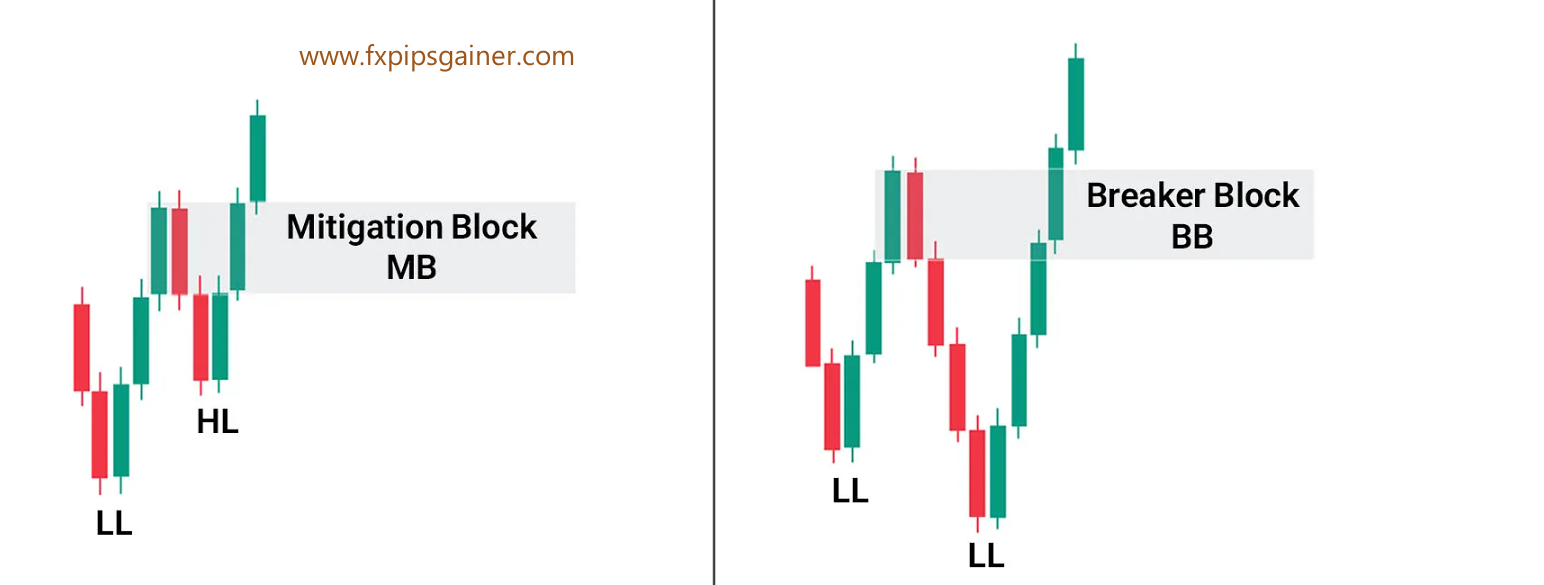
A market structure break (MSB) occurs
—for example, the price breaks the previous Higher Low (HL) in an uptrend.The candle or zone responsible for that failed continuation becomes the Mitigation Block.
After the structure break, price often retraces into this block, allowing smart money to:
Fill unfilled orders
Mitigate earlier buy/sell positions
Continue pushing price in the new direction
This retracement into the Mitigation Block frequently creates a high-probability entry point.
Mitigation Block Example (XAG/USD – 15-Min Chart)
Let’s break down your example in a clean, reader-friendly way: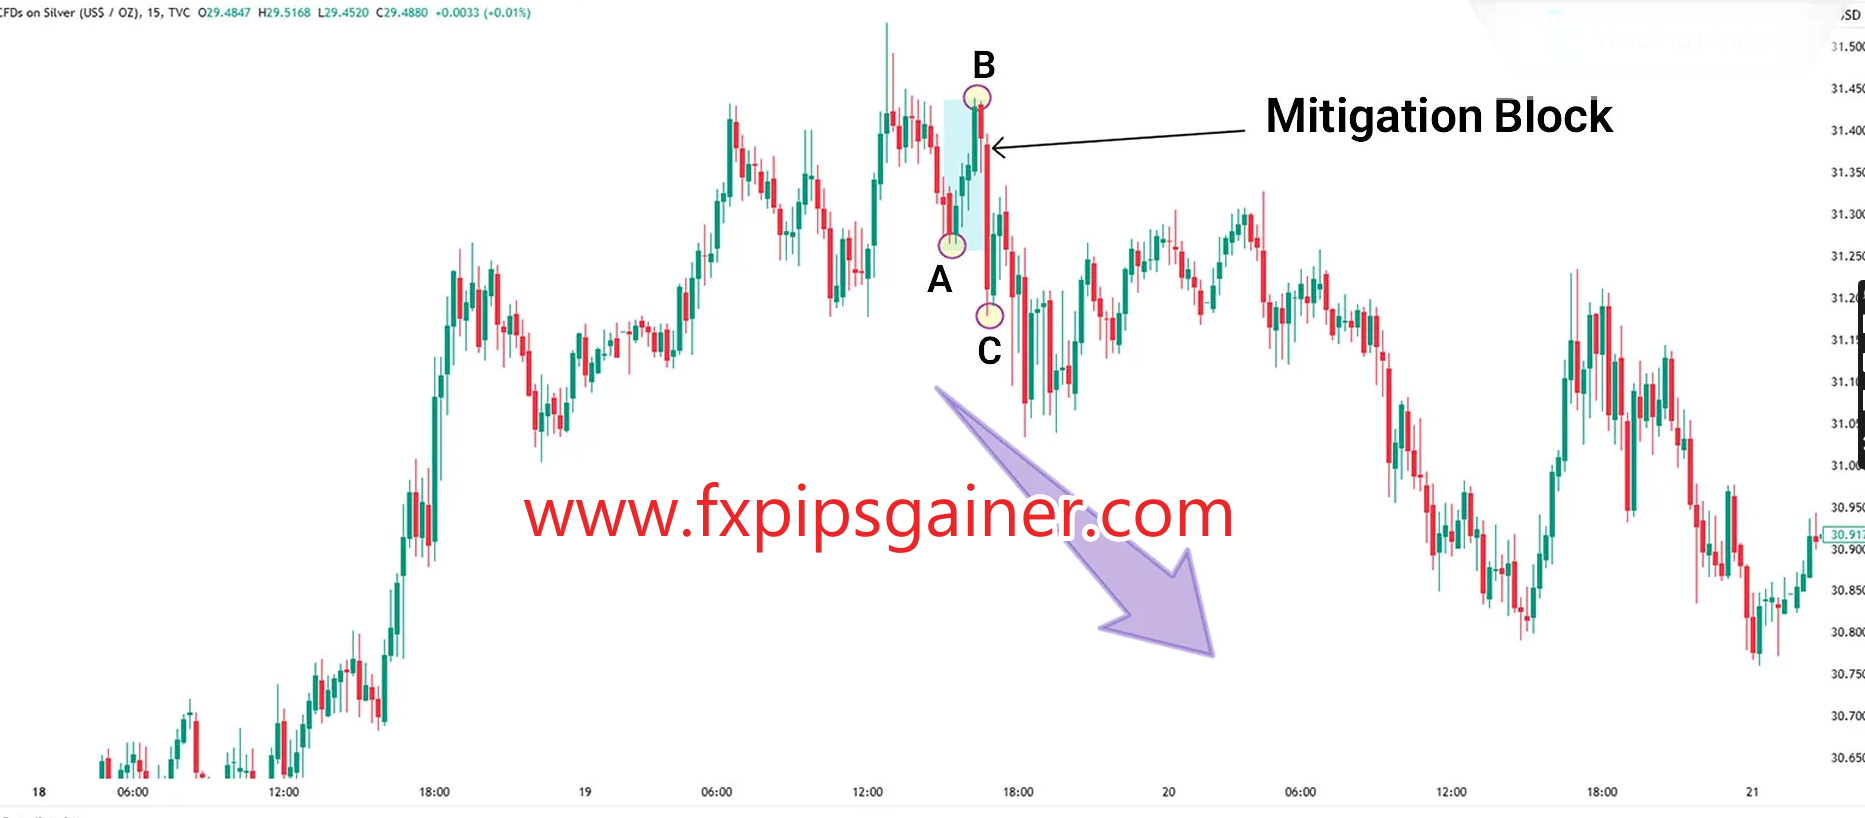
1. Trend Continuation Phase
The market was in an uptrend, producing:
Higher Highs (HH)
Higher Lows (HL)
This confirms bullish momentum.
2. Price Meets a Bearish Reference Area
Once the price reached a significant bearish supply zone, it:
Failed to create a new Higher High
Showed signs of bullish exhaustion
This signals that institutional selling pressure may be entering the market.
3. Market Structure Shifts Bearish
Price then broke the previous Higher Low, switching the structure from bullish to bearish.
This break is crucial—it confirms that buyers have lost control.
4. The Mitigation Block Forms
The last bullish candle (or small zone) before the structure break becomes the Mitigation Block.
This is the area where:
Smart Money had previous buy orders
Institutions mitigate (cover) those earlier positions
New sell orders are placed to push price lower
5. Price Retraces Into the MB
After the market structure turns bearish, price typically retraces back into the Mitigation Block, creating a high-probability sell opportunity.
This is where traders look for:
A clean retest
Confirmations like rejections, imbalance fills, or SMC entry triggers
Why Mitigation Blocks Matter
Mitigation Blocks help traders understand:
Where institutional orders are located
Where price is likely to react
High-probability entry zones after a structure shift
Points where the market corrects inefficiencies
They are powerful tools for structure-based trading, especially within ICT’s SMC framework.


2. Bullish Mitigation Block
A Bullish Mitigation Block (MB) forms when a downtrend is losing strength and the price is preparing to reverse upward.
How It Forms
Price is moving downward, creating:
Lower Lows (LL)
Lower Highs (LH)
Price reaches a strong support level or demand zone.
Price fails to create a new Lower Low (LL), signaling seller exhaustion.
Price then breaks above the previous Lower High (LH) → confirming a Bullish Break of Structure (BOS).
The last bearish candle or small zone before this break becomes the Bullish Mitigation Block.
How to Identify a Bullish Mitigation Block (Step-by-Step)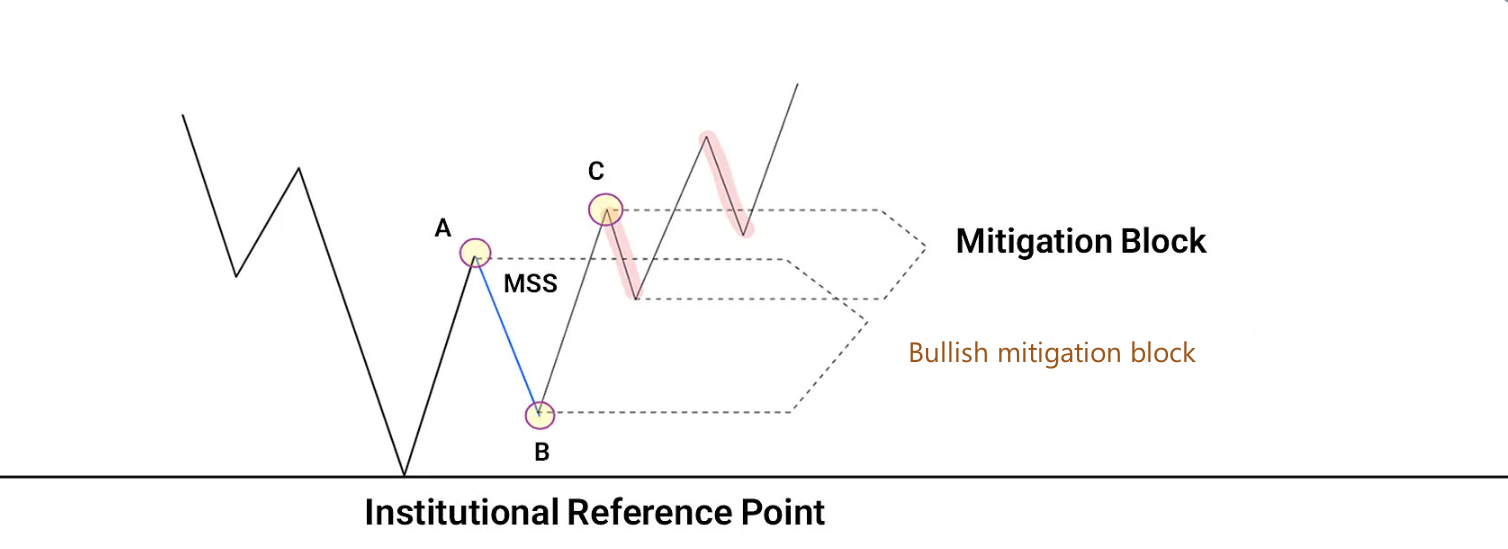
Higher Timeframe (HTF):
Price hits a major support or demand zone.
Lower Timeframe (LTF):
Price forms LL → LH (bearish structure)
LH fails to create a new LL
Price breaks above the LH → BOS occurs
The price pulls back into the zone between:
The broken LH, and
The Higher Low (HL) formed after BOS
This area = Bullish Mitigation Block
What This Zone Means
Traders who sold late in the downtrend are trapped and reduce losses.
Smart Money uses this zone to mitigate earlier sell positions and initiate buy orders.


With a focus on credibility and transparency, IraqRankings.com provides users with dependable rankings for Iraq’s leading companies, best Iraqi brands, and top trusted services in Iraq. The platform uses large verified datasets and continuous audits to ensure that all information stays accurate, making it a powerful resource for anyone searching for trustworthy companies in the Iraqi market.